The Seven Steps
Parapets and Cornices
Purpose
To secure parapets and cornices.
Recommendation
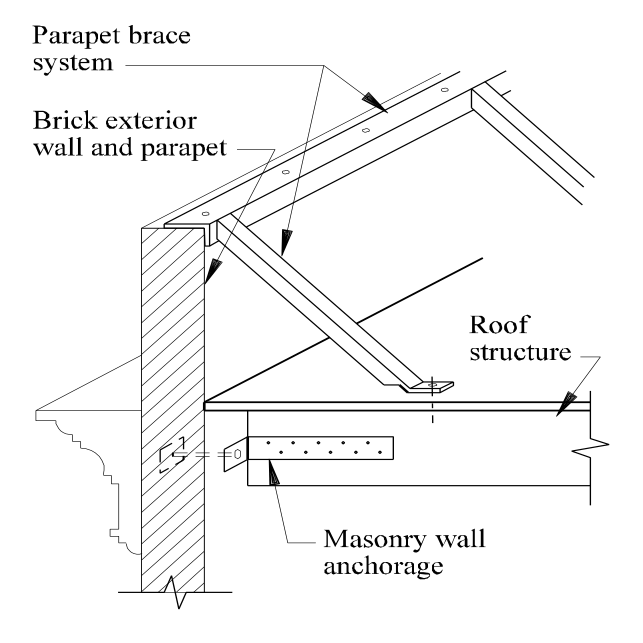
Parapet Brace System
Source: Noson, Perbix, SSD
Consult a structural engineer to implement any of the options below, where parapet or cornice height is greater than 1.5 times the thickness, some over-strengthening is advisable.
Supplies Required
- Angle—3″ x 3″ x 1/4″
- Continuous angle and channel
- All-thread rod—3/4″ diameter
- Lag bolts—3/4″ diameter
- Epoxy grout
- Blocking—4″ x 8″
- Clips—Simpson A 35
- Masonry wall anchor—Simpson LTT
Installation: 8″ Wall Thickness
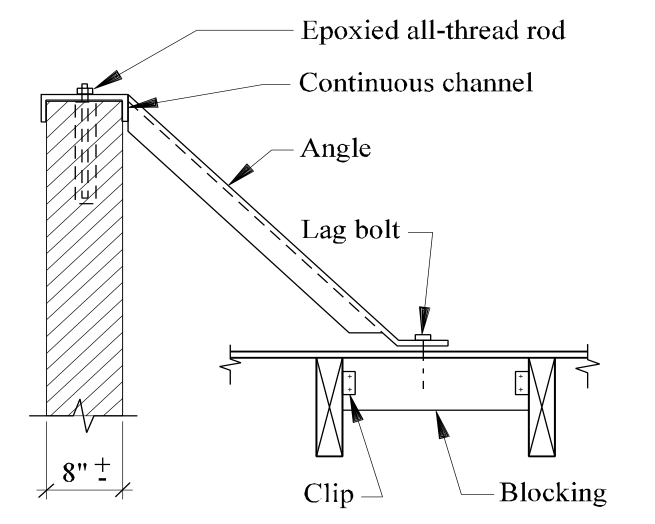
8-inch Wall Thickness
Source: Noson, Perbix, SSD
- Attach continuous channel to the top of the parapet with all-threads embedded 12″ and epoxy at 4′ on center.
- Weld 3″ x 3″ angle at 8′ on center to continuous channel. Provide a lag bolt from the angle to a joist or blocking in the roof.
Caution
Parapets and cornices can detach during an earthquake, causing injuries and deaths.
Installation: 13″ Wall Thickness
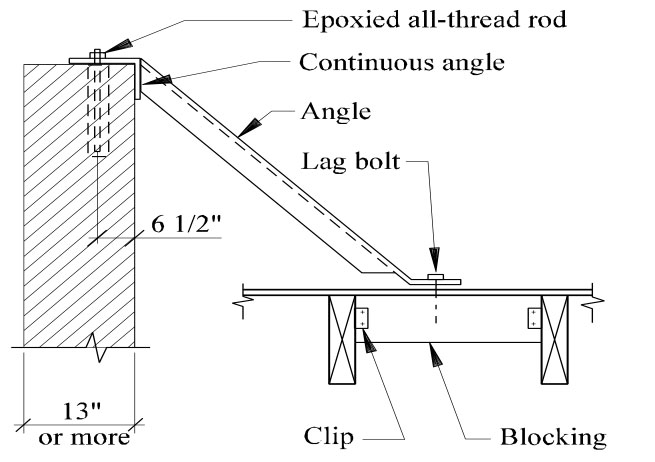
13-inch Wall Thickness
Source: Noson, Perbix, SSD
- Attach continuous channel to the top of the parapet with all-threads embedded 12″ and epoxy at 4′ on center. Place all thread at least 6-1/2″ away from the edge of the parapet.
- Weld 3″ x 3″ angle at 8′ on center to continuous channel. Provide lag bolt from angle to joist or blocking in roof.
Note
Consult an architect for waterproofing details where structural connections penetrate roofing or flashing.


