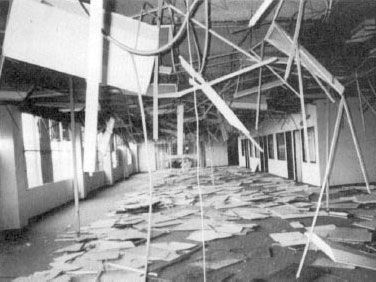
The Problem
How to Identify It
Lift a ceiling tile and look up into the space above the ceiling. If the tiles seem loose in their frames, they may fall when the building begins to move. In rooms more than 12 feet wide, you should see diagonal wires and vertical pipe struts connecting the ceiling tiles’ framework to the building’s framing above, spaced every 12 feet.
Look for wide, secure supports for the ceiling framework around the room’s edges.
Each light fixture and duct vent should be securely supported with at least two wires to the building framing above.
What Can Be Done
Make sure there are gaps that will allow pipes to move where they pass through ceilings and partitions.

General Recommendations
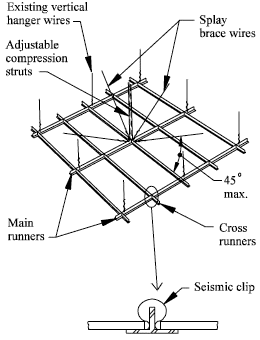
- Provide splay brace wires and compression struts.
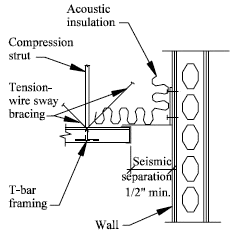
- Separate the edges of suspended ceilings from enclosing walls.
- Secure lay-in tiles and boards used in ceiling grids with clips at exitways and corridors.
Supplies Required
- Wire—No. 12 gage
- Adjustable compression struts
- Ceiling panel clips
Installation
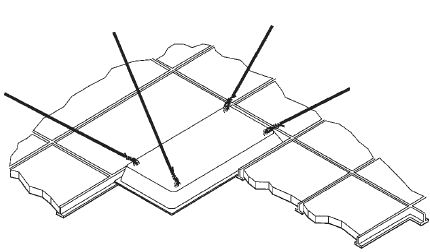
- Install splayed wires at 12′ on center in four directions.
- Provide adjustable compression struts, at center of splayed wires, and attach to the structure above.
- Provide ceiling tile clips at exits and stairwells.
- Provide 1/2″ minimum separation between the ceiling system and the enclosing walls.
Suspended ceilings in concrete and steel buildings.
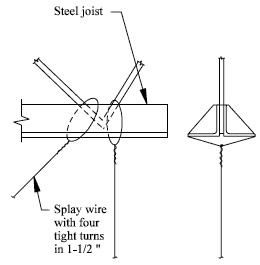
When anchoring to post-tensioned slab, locate and avoid reinforcing.
Supplies Required
- Wire—No. 12 gage
- Adjustable compression struts
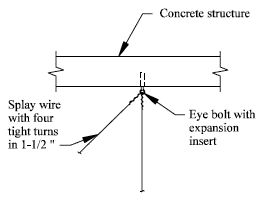
- Eye-bolts with expansion inserts—3/8″ diameter
Installation
- Install splay wires at 12′ on center in four directions (see “Typical Ceiling Grid” graphic above for layout).
- Attach adjustable compression struts, placed at the center of the splayed wires, to the structure above.
Suspended ceilings in wood buildings.
- Wire—No. 12 gage
- Staples—No. 9 gage, 1-1/2″
OR
Stronghold J nails - Eye-screws—1/4″ diameter
- Nails—16 penny common
- 2x blocking
- Adjustable compression struts
Installation
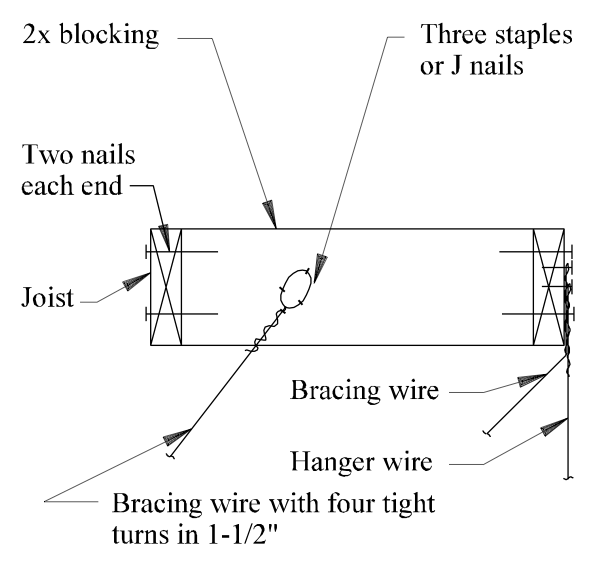
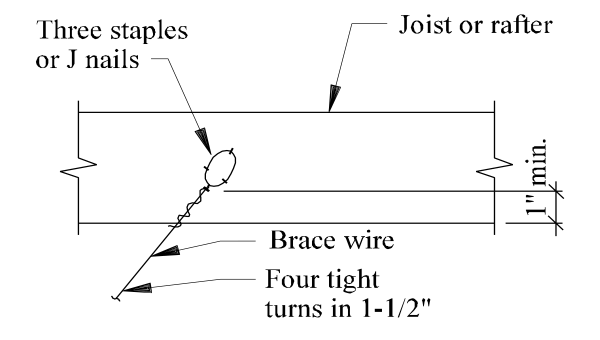
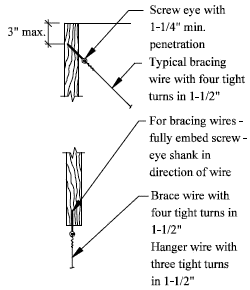
- Install splay wires at 12′ on center in four directions with staples, J nails, or eye-screws (see “Typical Ceiling Grid” graphic above for layout).
- Install 2x blocking between joists with common nails, where required for the attachment of splayed wires.
- Provide adjustable compression struts, at center of splayed wires, to the structure above.

