The Seven Steps
Emergency Batteries
Purpose
Recommendation
Anchor battery sets to the building with bolts.
Supplies Required
- Angle—3″ x 3″ x 3/8″
- Angle—5″ x 3″ x 3/8″
- Expansion bolts—1/2″ diameter
- Machine bolts—1/2″ diameter
- Lag bolts—3/8″ diameter x 4″ (for wood)
- Styrofoam spacers
- Unistrut frames
- Velcro, nylon, or metal shipping bands
- Strap bracing—16 gage x 1″
- Sheet metal screws—No. 10
- Shipping bands or bungee chords
Installation
Free-Standing Battery Racks
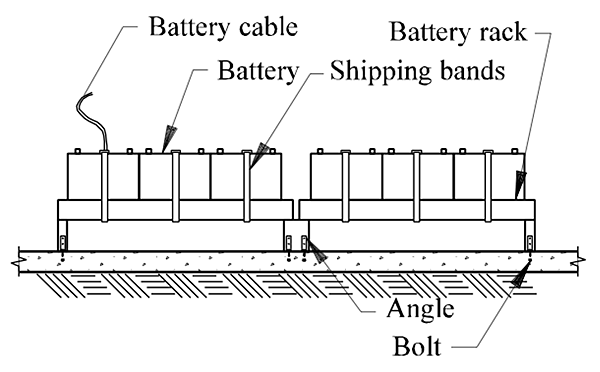
- Install angle (5″ x 3″ x 3/8″) at each leg of the battery rack.
- Bolt to the floor with expansion bolts and bolt to the rack with machine bolts.
- Strap each battery to the rack with shipping bands.
Wall-Mounted Battery Racks
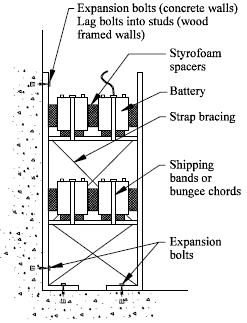
- Bolt battery rack to wall and floor with expansion bolts. At wood-framed walls, secure to wall with lag bolts into studs. (Do not attach to gypsum wallboard only.)
- Brace full height with X-bracing where wall support is unavailable. Provide two screws at each end of the X-bracing.
- Strap each battery to the rack with shipping bands.
Single Battery On Floor
- Install angle (3″ x 3″ x 3/8″) on each side of battery rack.
- Bolt each angle to the floor with two expansion bolts.
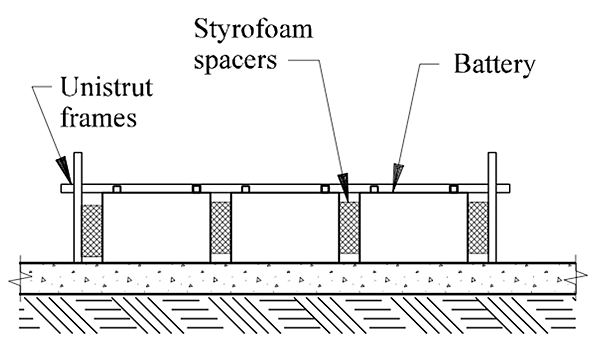
Multiple Batteries on Floor
Provide unistrut frame secured to the floor.
Caution
When anchoring to post-tensioned slab, locate and avoid reinforcing.
Note
- Provide slack in battery cables.
- Place Styrofoam spacers between batteries.


